Vesc tool
Author: w | 2025-04-24

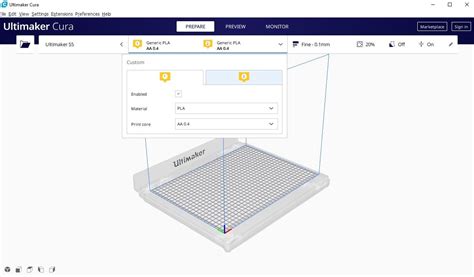
VESC-Tool is the go-to configuration software for anything in motion. Technical Documentation can be found here. The VESC-Tool is compatible with the latest VESC hardware, most VESC-based hardware of the past. The VESC-Tool mobile App is available in the Google Play Store in the Apple App Store VESC Hardware
VESC Tool Free - VESC Project
First of all, let me say hello to everybody as this is my first post to this forum although I have been following the VESC project for around 2 years. I have only been using VESC tool for Android along with the new bluetooth 4.0 module. All references I make to VESC tool are for the Android phone version. My hardware consists of 2 original VESC 6.6's from Trampa connected through CAN, and the BLE module. I have already run the FOC wizard and got my motor working, but I want to make sure I have given the wizard the correct parameters for optimal operation and a correct speed reading. My motors are not typical; each motor is actually 2 Ninebot scooter in-wheel motors side by side. The stators are keyed to the same orientation on shafts I machined from 4340 steel to accommodate both stators. The rotors are coupled together with an aluminum spacer that orients the magnet poles in line. The mechanical alignment allows me to run 2 motors (with the phase wires connected in parallel) using the hall sensors from only one, and with only 1 VESC. This theoretically doubles the torque output from each wheel with the added benefit of the wheels looking like the double tires on the batmobile! It also takes better advantage of the power capabilities of the VESC6 hardware, which was my original motivation for doubling-up.I don't know the KV of these motors, but I believe the scooters they came from are rated at 300 watts. However, I also think that number comes from the limits of the original controller because the (double)motor I already set up can draw up to 59 amps according to VESC tool. At 41.7 volts (battery voltage during testing) this works out to 1230 watts per motor. That is not a continuously sustainable current draw, but rather the max surge amp draw that can occur. My battery is custom built with Panasonic NCR18650 cells in a 10S9P configuration giving 27Ah capacity.When I ran detection on the first motor, I used the following setup parameters:- Type: Large outrunner- Power loss changed to 150W from the default 200 (I was scared of frying motor)- Motor poles: 15 (this is one setting I'm a little confused about. I will explain below)- Sensorless ERPM left at default of 4000- Openloop ERPM left at default of 1000I am unsure if I should run the detection with "power loss" set to 600. My reason for doing so would be that these motors are designed to run at 300W continuous, and I have 2 coupled together. But after seeing that the E-bike hub motor (a similar motor type) is set to only 75W, the warning message has me scared I will fry the motors if I change the setting that high. I don't know the final effect this setting has on the available power output, but I assume that if the detection can't run the motor at its max safe current, the final power. VESC-Tool is the go-to configuration software for anything in motion. Technical Documentation can be found here. The VESC-Tool is compatible with the latest VESC hardware, most VESC-based hardware of the past. The VESC-Tool mobile App is available in the Google Play Store in the Apple App Store VESC Hardware Then connect the main battery terminals to the input for the VESC and a micro USB cable between the VESC and your computer. Select the VESC Tools connect icon: or . Note: When you connect the VESC to VESC Tools, it may warn you that there is a newer firmware version for the VESC. Feel free to update it on VESC 6.x versions. Do not upgrade VESC VESC Tool is the all new and 100% revised replacement for BLDC-Tool. Users of the original hardware should download VESC Tool Original or the official VESC-Tool mobile App. VESC Tool Free. Submitted by benjamin on Tue, . VESC Tool is the all new and 100% revised replacement for BLDC-Tool VESC Tool can be used with the latest VESC compatible Hardware and most VESC based Hardware of the past. It does not only allow you to configure your Configuration of your VESC or VESC based ESC using the VESC -Tool Software. In this tutorial we will configure a genuine VESC motor controller in combination with a BLDC motor. TORQUE ESC compatible with VESC Software. TORQUE ESC based upon the VESC Open Source Project. The latest VESC BLDC Tool can be downloaded here. Our VESC is v4.12 Hardware Version. Current Firmware Version - v3.38. Github link for firmware Github link for VESC Tool You can find the latest VESC Tool Documentation and m Find precompiled VESC Tool builds for Windows, Linux, macOS and Android in this forum thread. VESC Tool is a software for configuring and tuning VESC-based electric The source code for VESC Tool. See vesc-project.com - vedderb/vesc_tool Is connectable to the famous VESC-Tool App. You can not only monitor the pack, but also work on your pack and start and stop balancing, even if you're not charging at that time. The BMS also features CAN-Bus connection and VESC motor controllers can therefore know individual cell voltages, so that a low voltage cutoff can be executed in reference to the lowest cell voltage in the pack, preventing over-discharge of individual P-groups. The BMS features SWD, CAN and USB connectivity. FW updates can be managed via VESC-Tool and the CAN interface. CAN also allows you to couple individual packs to form a bigger battery array (in series, in parallel or both). The CAN Bus is therefore 600V isolated.Safety:- Individual cell fusing will give you the confidence that each cell in the pack is secured against short circuiting. A faulty cell would be decoupled within seconds and would therefore not cause any further danger.- Temperature monitoring in up to 5 locations of the pack.- Humidity sensor- Self monitoring, automotive grade chipset.- App connectivity lets you see what is going on with your pack. Are my cell all healthy and good?- Charge port with Mosfet switch allows the BMS to decouple the charger at any time.- Easy to service and extract unhealthy cells.Pack capacity is roughly 1KWh:Sony VTC 6: 3120mAh x 7 = 21840mAh = 969WhSamsung Q30: 3000mAh x 7 = 21000mAh = 932WhLG 18650 MJ1: 3500mAh x 7 =24500mAh = 1087WhBuild time:Roughly 45 minutesFlight legal:-Extract cells and box in air travel safe 99Wh packs-Check with Airline prior to flight-Reassemble pack after arrivalParallel and Serial arrays: These packs can be stacked in parallel and series.Comments
First of all, let me say hello to everybody as this is my first post to this forum although I have been following the VESC project for around 2 years. I have only been using VESC tool for Android along with the new bluetooth 4.0 module. All references I make to VESC tool are for the Android phone version. My hardware consists of 2 original VESC 6.6's from Trampa connected through CAN, and the BLE module. I have already run the FOC wizard and got my motor working, but I want to make sure I have given the wizard the correct parameters for optimal operation and a correct speed reading. My motors are not typical; each motor is actually 2 Ninebot scooter in-wheel motors side by side. The stators are keyed to the same orientation on shafts I machined from 4340 steel to accommodate both stators. The rotors are coupled together with an aluminum spacer that orients the magnet poles in line. The mechanical alignment allows me to run 2 motors (with the phase wires connected in parallel) using the hall sensors from only one, and with only 1 VESC. This theoretically doubles the torque output from each wheel with the added benefit of the wheels looking like the double tires on the batmobile! It also takes better advantage of the power capabilities of the VESC6 hardware, which was my original motivation for doubling-up.I don't know the KV of these motors, but I believe the scooters they came from are rated at 300 watts. However, I also think that number comes from the limits of the original controller because the (double)motor I already set up can draw up to 59 amps according to VESC tool. At 41.7 volts (battery voltage during testing) this works out to 1230 watts per motor. That is not a continuously sustainable current draw, but rather the max surge amp draw that can occur. My battery is custom built with Panasonic NCR18650 cells in a 10S9P configuration giving 27Ah capacity.When I ran detection on the first motor, I used the following setup parameters:- Type: Large outrunner- Power loss changed to 150W from the default 200 (I was scared of frying motor)- Motor poles: 15 (this is one setting I'm a little confused about. I will explain below)- Sensorless ERPM left at default of 4000- Openloop ERPM left at default of 1000I am unsure if I should run the detection with "power loss" set to 600. My reason for doing so would be that these motors are designed to run at 300W continuous, and I have 2 coupled together. But after seeing that the E-bike hub motor (a similar motor type) is set to only 75W, the warning message has me scared I will fry the motors if I change the setting that high. I don't know the final effect this setting has on the available power output, but I assume that if the detection can't run the motor at its max safe current, the final power
2025-04-19Is connectable to the famous VESC-Tool App. You can not only monitor the pack, but also work on your pack and start and stop balancing, even if you're not charging at that time. The BMS also features CAN-Bus connection and VESC motor controllers can therefore know individual cell voltages, so that a low voltage cutoff can be executed in reference to the lowest cell voltage in the pack, preventing over-discharge of individual P-groups. The BMS features SWD, CAN and USB connectivity. FW updates can be managed via VESC-Tool and the CAN interface. CAN also allows you to couple individual packs to form a bigger battery array (in series, in parallel or both). The CAN Bus is therefore 600V isolated.Safety:- Individual cell fusing will give you the confidence that each cell in the pack is secured against short circuiting. A faulty cell would be decoupled within seconds and would therefore not cause any further danger.- Temperature monitoring in up to 5 locations of the pack.- Humidity sensor- Self monitoring, automotive grade chipset.- App connectivity lets you see what is going on with your pack. Are my cell all healthy and good?- Charge port with Mosfet switch allows the BMS to decouple the charger at any time.- Easy to service and extract unhealthy cells.Pack capacity is roughly 1KWh:Sony VTC 6: 3120mAh x 7 = 21840mAh = 969WhSamsung Q30: 3000mAh x 7 = 21000mAh = 932WhLG 18650 MJ1: 3500mAh x 7 =24500mAh = 1087WhBuild time:Roughly 45 minutesFlight legal:-Extract cells and box in air travel safe 99Wh packs-Check with Airline prior to flight-Reassemble pack after arrivalParallel and Serial arrays: These packs can be stacked in parallel and series.
2025-04-16Output will also be limited. Am I correct in that assumption? Is this setting asking for the power rating of the motors?The other thing I'm confused about is the number of poles. The reason I'm confused is that elsewhere in VESC tool (I think it was somewhere in the motor settings page), the number of poles that can be selected can only be changed by factors of 2. But in the detection settings, the number of poles can be changed by factors of 1. My motors have 30 magnets... 15 pole pairs. Should I set it to 30, or 15? If it should be set to 30, then VESC tool should be changed to only allow this number to be even, like it is elsewhere in VESC tool.And what is the effect of changing the "openloop ERPM" and "sensorless ERPM" values on the final motor parameters? Does a higher value change the max ERPM output when detection is complete, or does it just make sure the motor can start spinning synchronously during the detection without sensor feedback?These settings are probably easily recognized and set by a person who has taken an electric motor design course, but I have not. I'm not a dummy, but I'm also not an electronics engineer. I'm somewhere in the middle of the competence scale with electronics. Its a hobby, and I have no formal training. But I do have 35 years or so of experience with repairing and using electronics and automation control systems.I look forward to sharing pictures of this crazy build when it is complete. It will have independent 8cm swing-arm suspension, hopefully reach 68kph and be mostly silent due to the in-wheel direct drive motors. I want it to exceed a stock Bajaboard G4 in speed and power performance although it is being designed for mostly pavement riding (with the suspension for handling jumps off stairs and curbs and stuff).
2025-04-01VESC battery packs are the latest in innovative battery technology. These packs offer a high energy density (WH per Volume) and are therefore perfect to power mountainboards or any other applications.So what makes these packs so special?The VESC Battery Pack Technology doesn't use spot welding to interconnect the individual cells. The connection is made via a special, 25A fused contact element, designed and manufactured by TRAMPA BOARDS LTD.Using this pack allows you to purchase cells locally and fit them into a 12S7P cell array. After closing the pack, you have a perfect battery with a perfect battery management system. And if a cell goes bad one day, you can swap out individual p-groups in no time.If your cells reach their end of life, you can simply buy new cells and recycle the old. So instead of buying a new and expensive pack, you will only need relatively cheap new cells. The initial investment might equal the investment of a pre-made pack, but as soon as it's time to replace the cells, the price drop in getting a second pack is dramatic. Spot welded pack can't be serviced and are pretty much useless the day one cell goes bad! Way too many good cells end in recycling these days, only because they sit next to a bad cell, permanently interconnected via a spot weld - we resolved this issue and offer an environmentally friendly solution, so that the same pack can stay healthy for a way longer period of time.Wiring:There is no wiring involved. Everything is PCB based, neat, tidy and clean.BMS:The BMS on this device is the latest in BMS technology. Using the same chipset that is used by the world's leading electric vehicle manufacturer TESLA, this pack features a self monitoring system of automotive grade. Beside that, the system monitors the pack temperature in several locations and allows placement of an additional temperature sensor that can be attached directly to a cell in the middle of the pack. A humidity sensor monitors the humidity inside the enclosure, so that water ingress can be spotted via App. Yes, the pack
2025-04-21Use this procedure to use a tool from a tool catalog in the AutoCAD Architecture 2022 toolset workspace. You can also copy tools stored in a tool package to a tool palette in the tool palette set. Click . Open the tool catalog containing the tool you want to use. If the tool is located in a specific category of the catalog, open that category. Select Add to Tool Palette when you hover the cursor over the content icon. To copy multiple tool palettes, press and hold Ctrl while clicking each palette; then right-click and select Add to Tool Palette. Choose the appropriate action: If you want to… Then… use the tool immediately click Insert into Drawing to insert the tool in to the drawing area. store a linked copy of the tool on a tool palette in the tool palette set click Add to Tool Palette to add the tool palette to the desired tool palette set. Note: A linked copy will only be created when the tool catalog has been set to linked. If the catalog has been set to non-linked, any tool from that catalog will be inserted as non-linked tool onto the AutoCAD Architecture 2022 toolset palette. create an unlinked copy of the tool on a tool palette in the tool palette set press and hold Alt. Then click Add to Tool Palette to add the tool palette in the desired tool palette set. Note: If the tool catalog containing the tool has been set to unlinked, you do not need to hold down Alt while adding the tool. It will be inserted as unlinked in any case. Note: If a tool palette does not accept a tool, it might be because the palette is set to allow updates only from a linked tool palette in
2025-04-21